
0. Recommendation
If you are new to CAD, watch this beginner-friendly playlist here, especially the Part Design workbench section.
1. Open FreeCAD

Launch FreeCAD from your system. Ensure that you have an up-to-date version of FreeCAD.
2. Open the Addon Manager

Go to Tools > Addon Manager and search for WakaTime.
3. Install the FreeCAD-WakaTime Addon

Install the FreeCAD-WakaTime Addon from the Addon Manager.
4. Restart FreeCAD & Enable WakaTime

After restarting, enable FreeCAD-WakaTime by going to the WakaTime workbench and pressing the Toggle WakaTime button. Then, wait for the console to show [WakaTime] Activated.
5. Create a New Parametric Body
Create a new Parametric Body.
6. Start the Bin Design
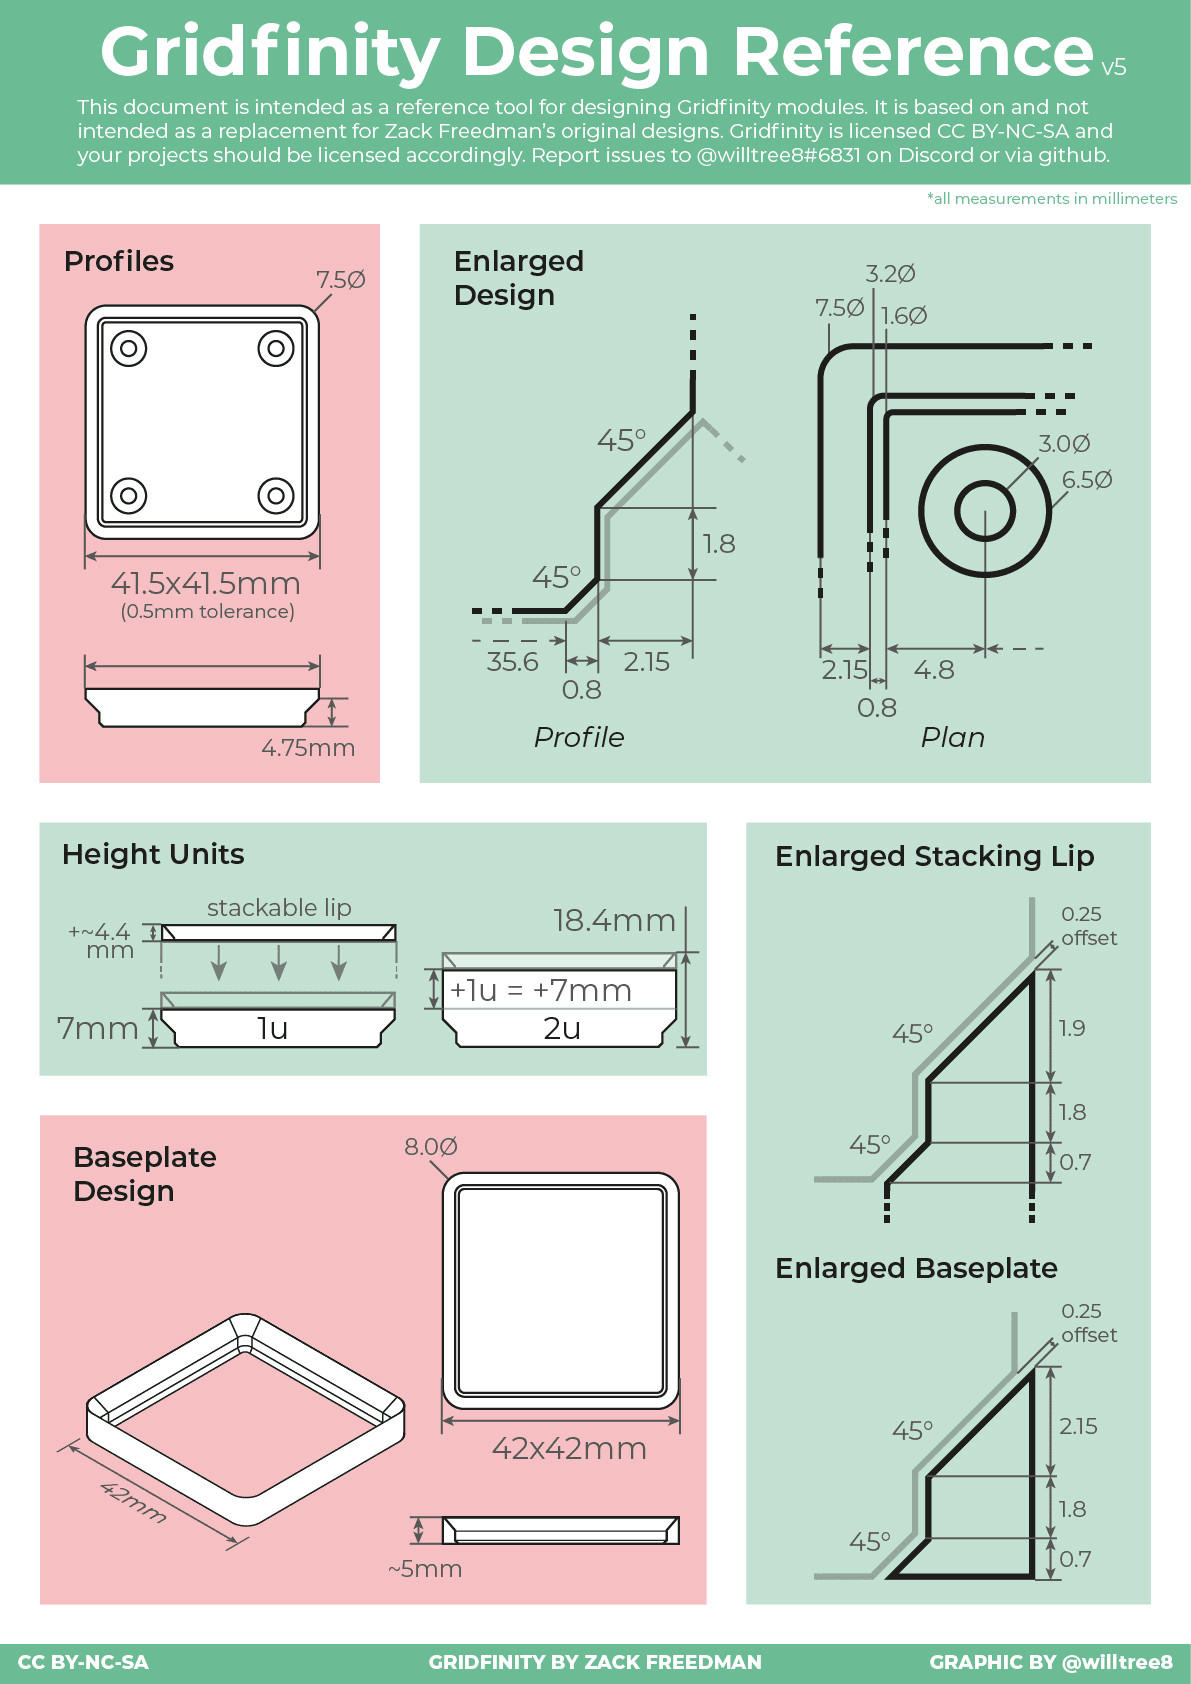
For this guide, we will be designing a 1x2 bin for holding SD cards and pens. We will be basing our design on the official Gridfinity design specification.
7. Create the Base Sketch


Create a new sketch by pressing the New Sketch button and selecting the top face (XY Plane).
8. Set Bin Dimensions

Define the bin size according to your needs (e.g. 1x2). To calculate the width and length of the bin, multiply the number of units by 42mm. For example, a 1x2 bin would be (1 x 42) mm wide and (2 x 42) mm long.
9. Extrude the Sketch

Now that we have the base shape of the bin, we can extrude it to give it height. Use the Pad tool and set the desired height. It is recommended to set the height to multiples of 7mm + 4.4mm for the final height so it aligns with the Gridfinity specification.
10. Fillet the Edges
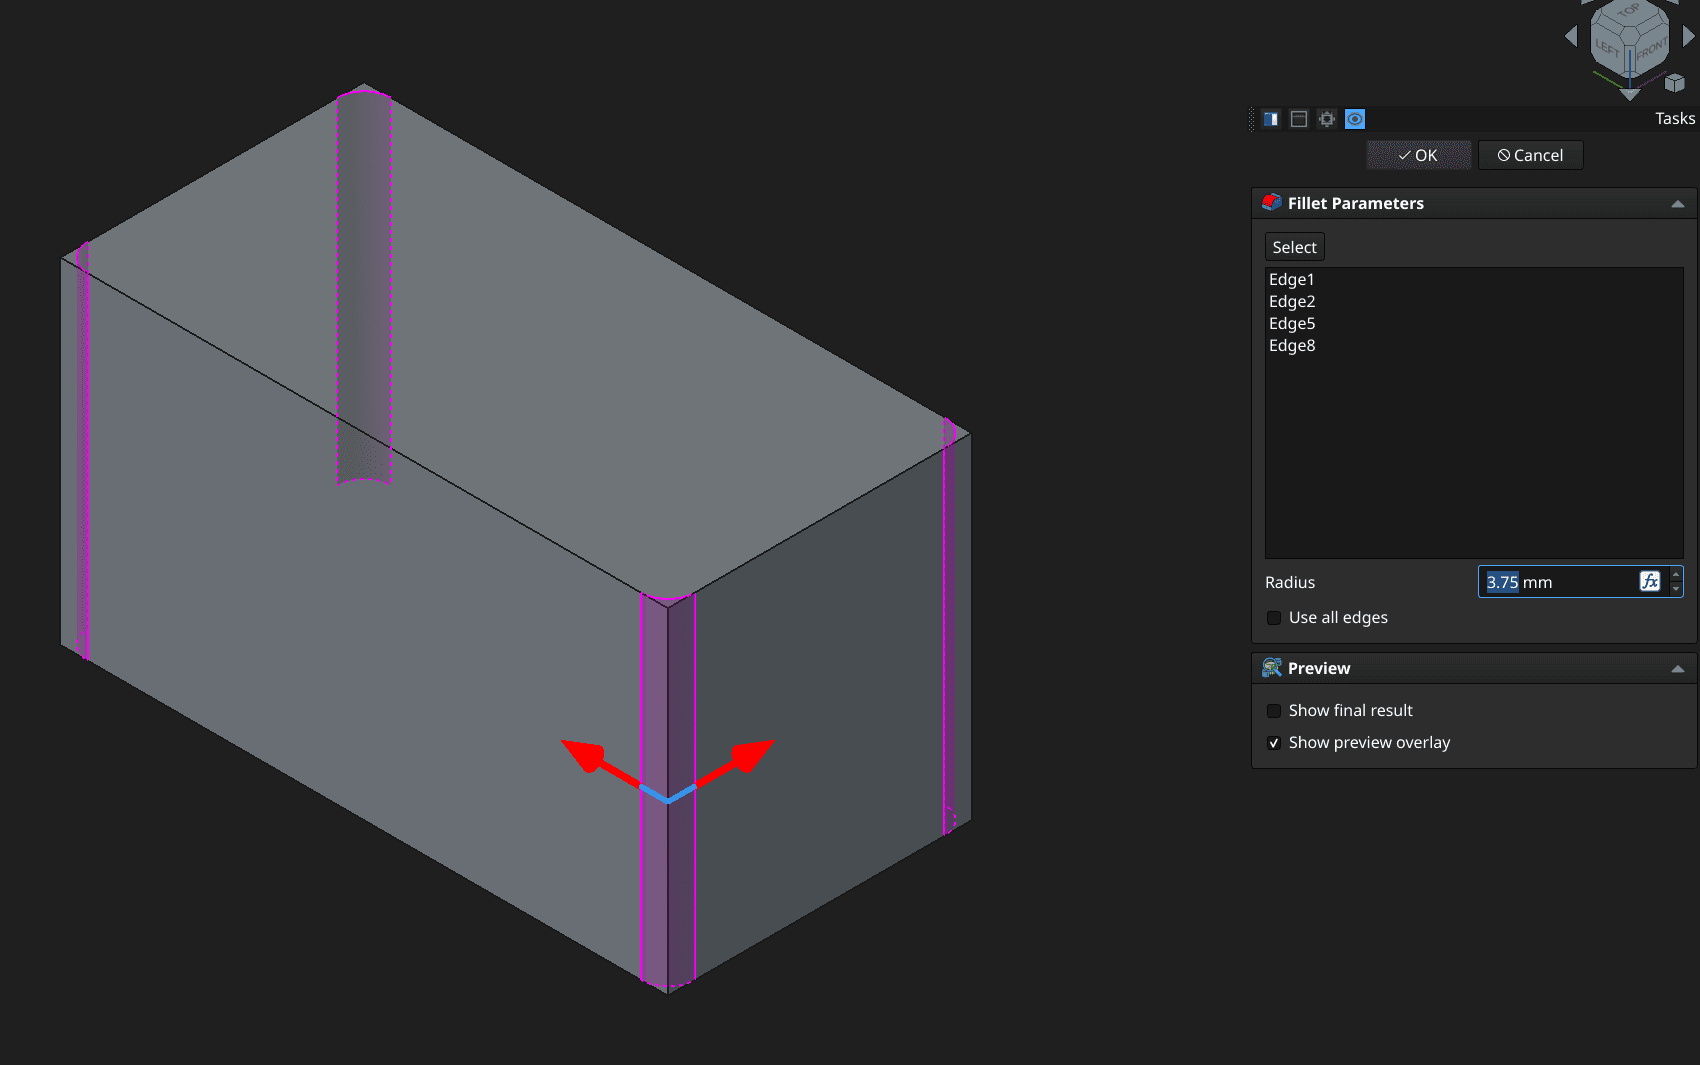
Now, using the Fillet tool, select the four lateral edges of the bin, and apply a 3.75mm fillet to them.
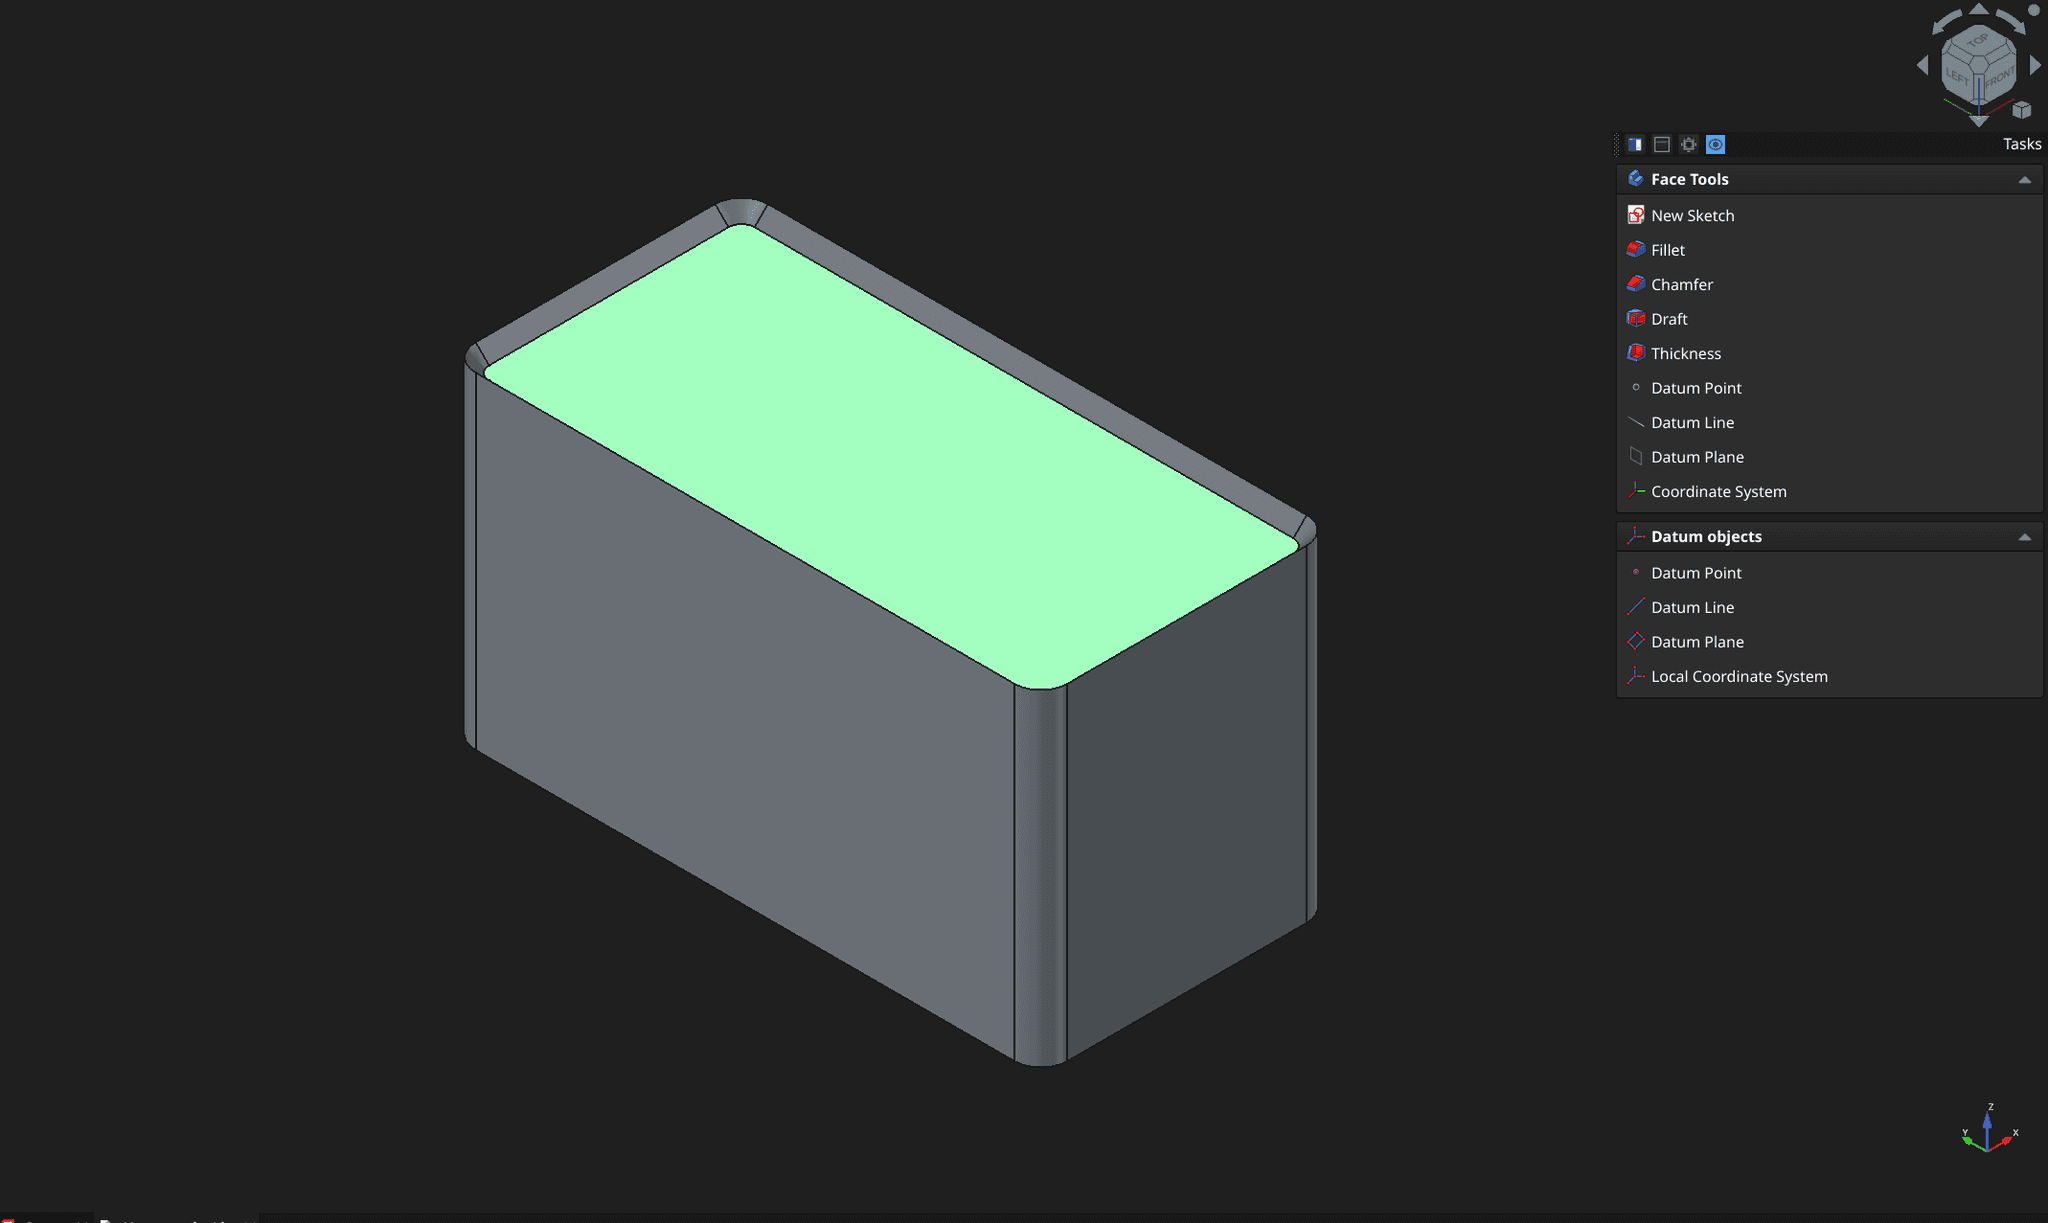
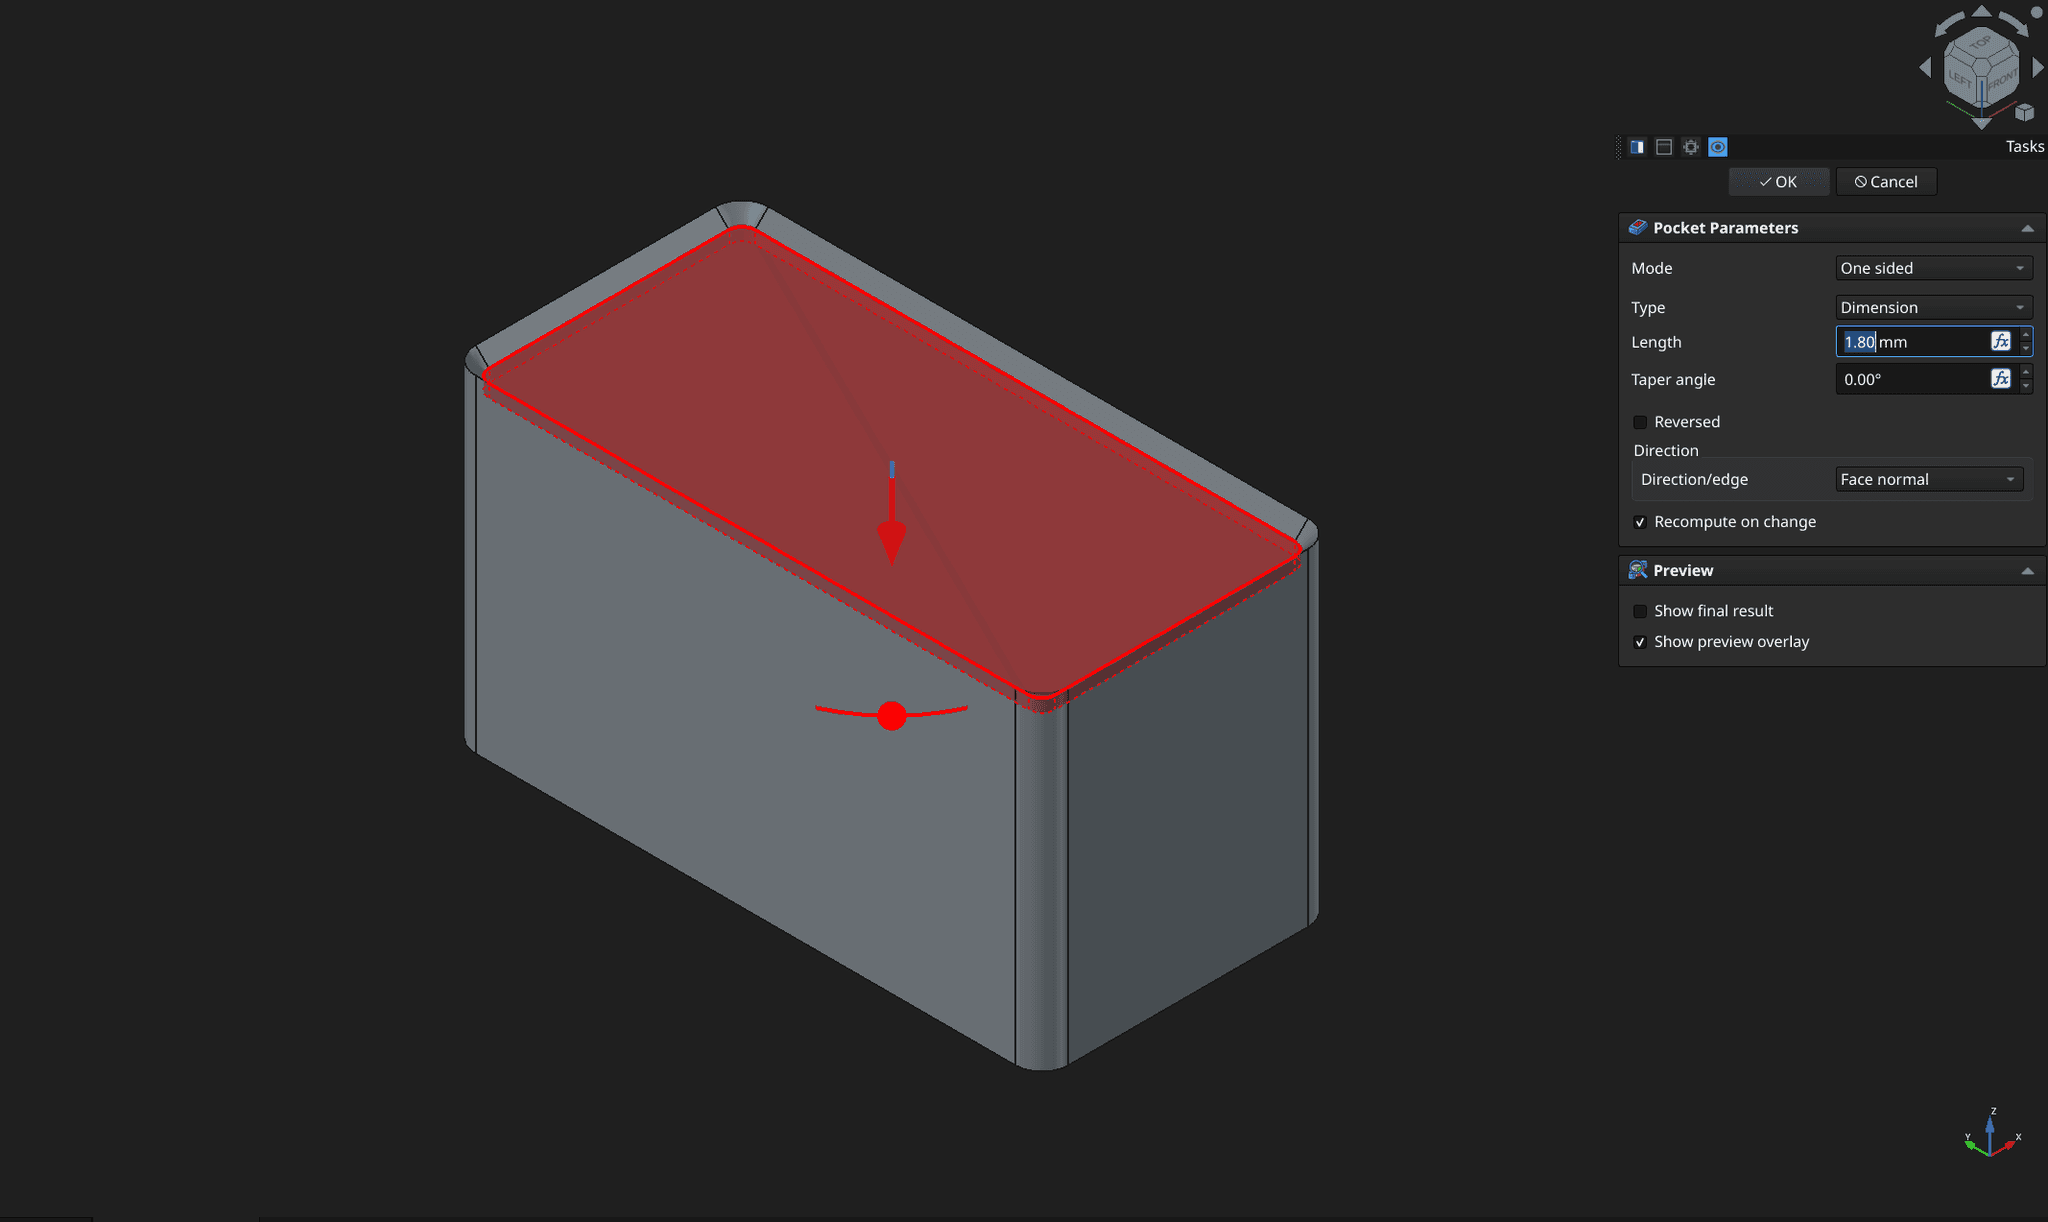
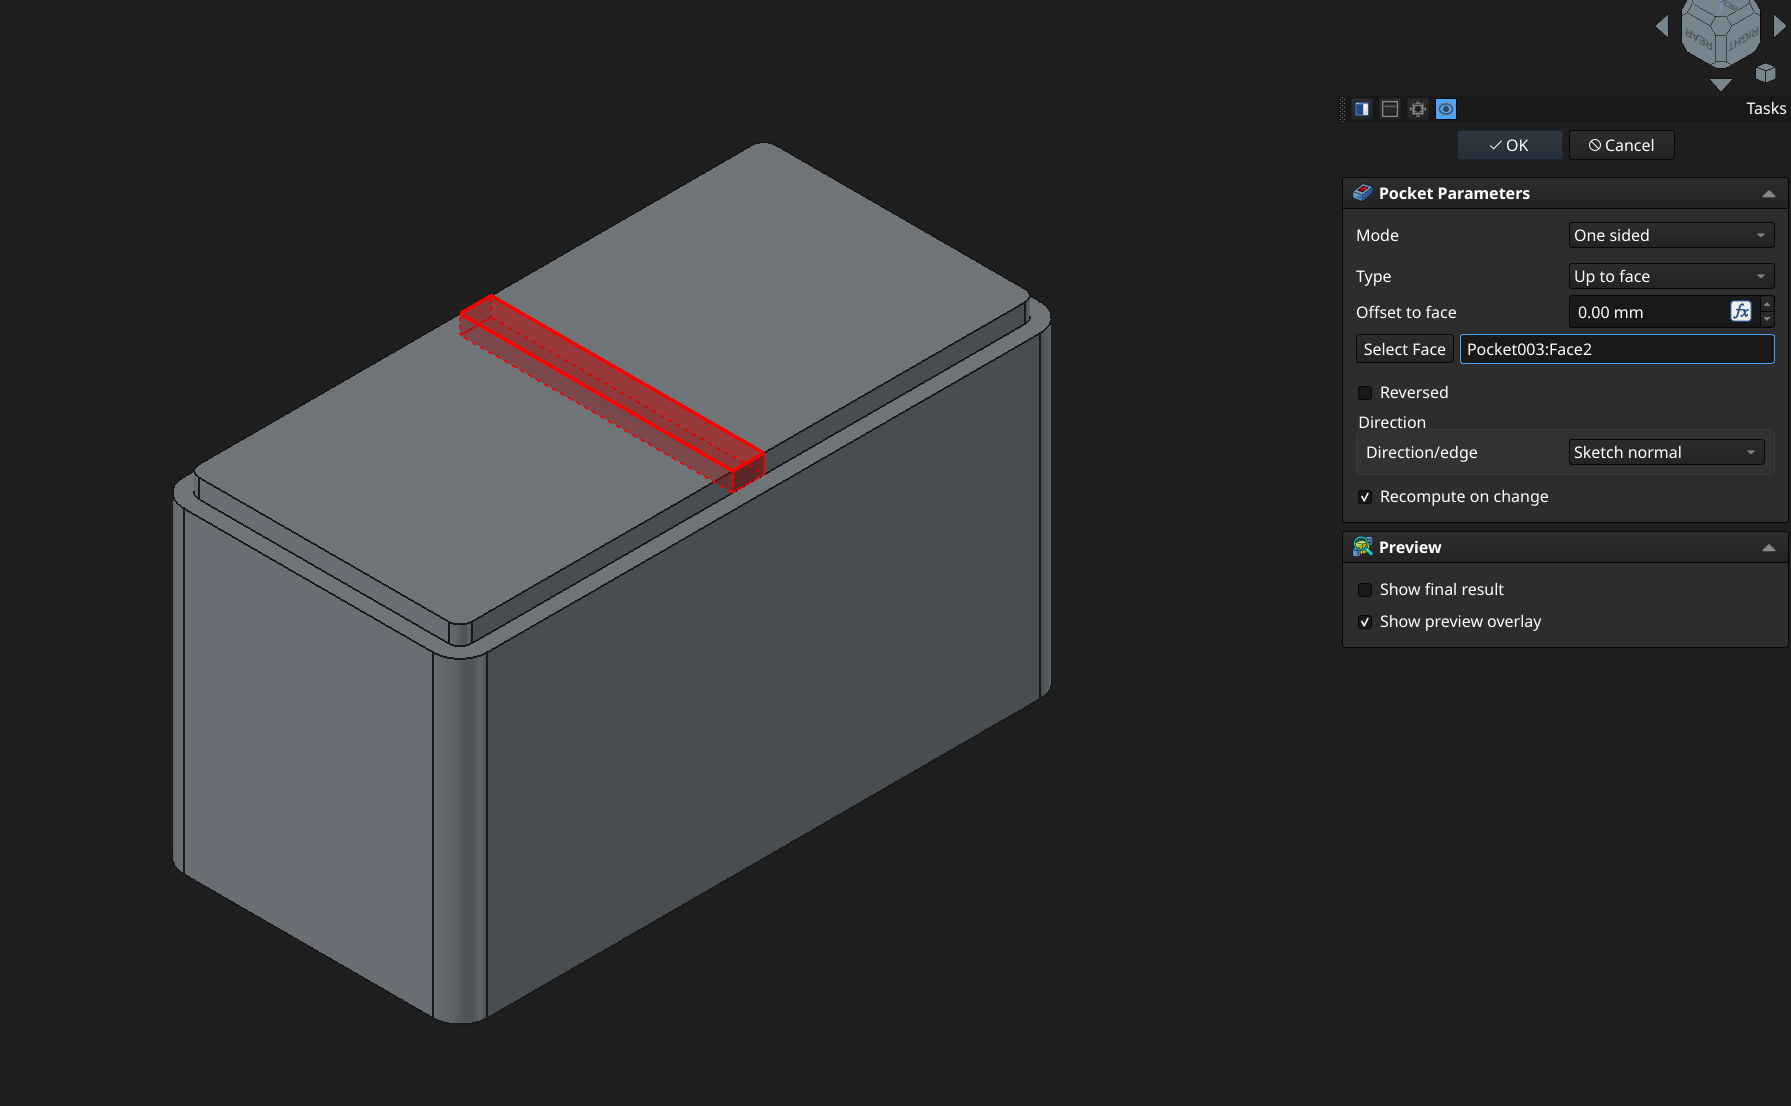
11. Top Lip
 Select the top face of the bin, and press the Pocket tool. Set the Length to 1.90 mm and the Taper Angle to -45º.
 Finally, create another Pocket of 0.7mm and -45º. This will create the characteristic lip of the Gridfinity bins.
12. Bottom of the Bin
 To create the bottom of the bin, select the bottom face, and create a new sketch. Then, using the External Geometry tool, click on the face, select the resulting edge, and using the Offset tool, create a 2.15mm offset.
 Next, exit the sketch, and create a 2.6mm Pocket.


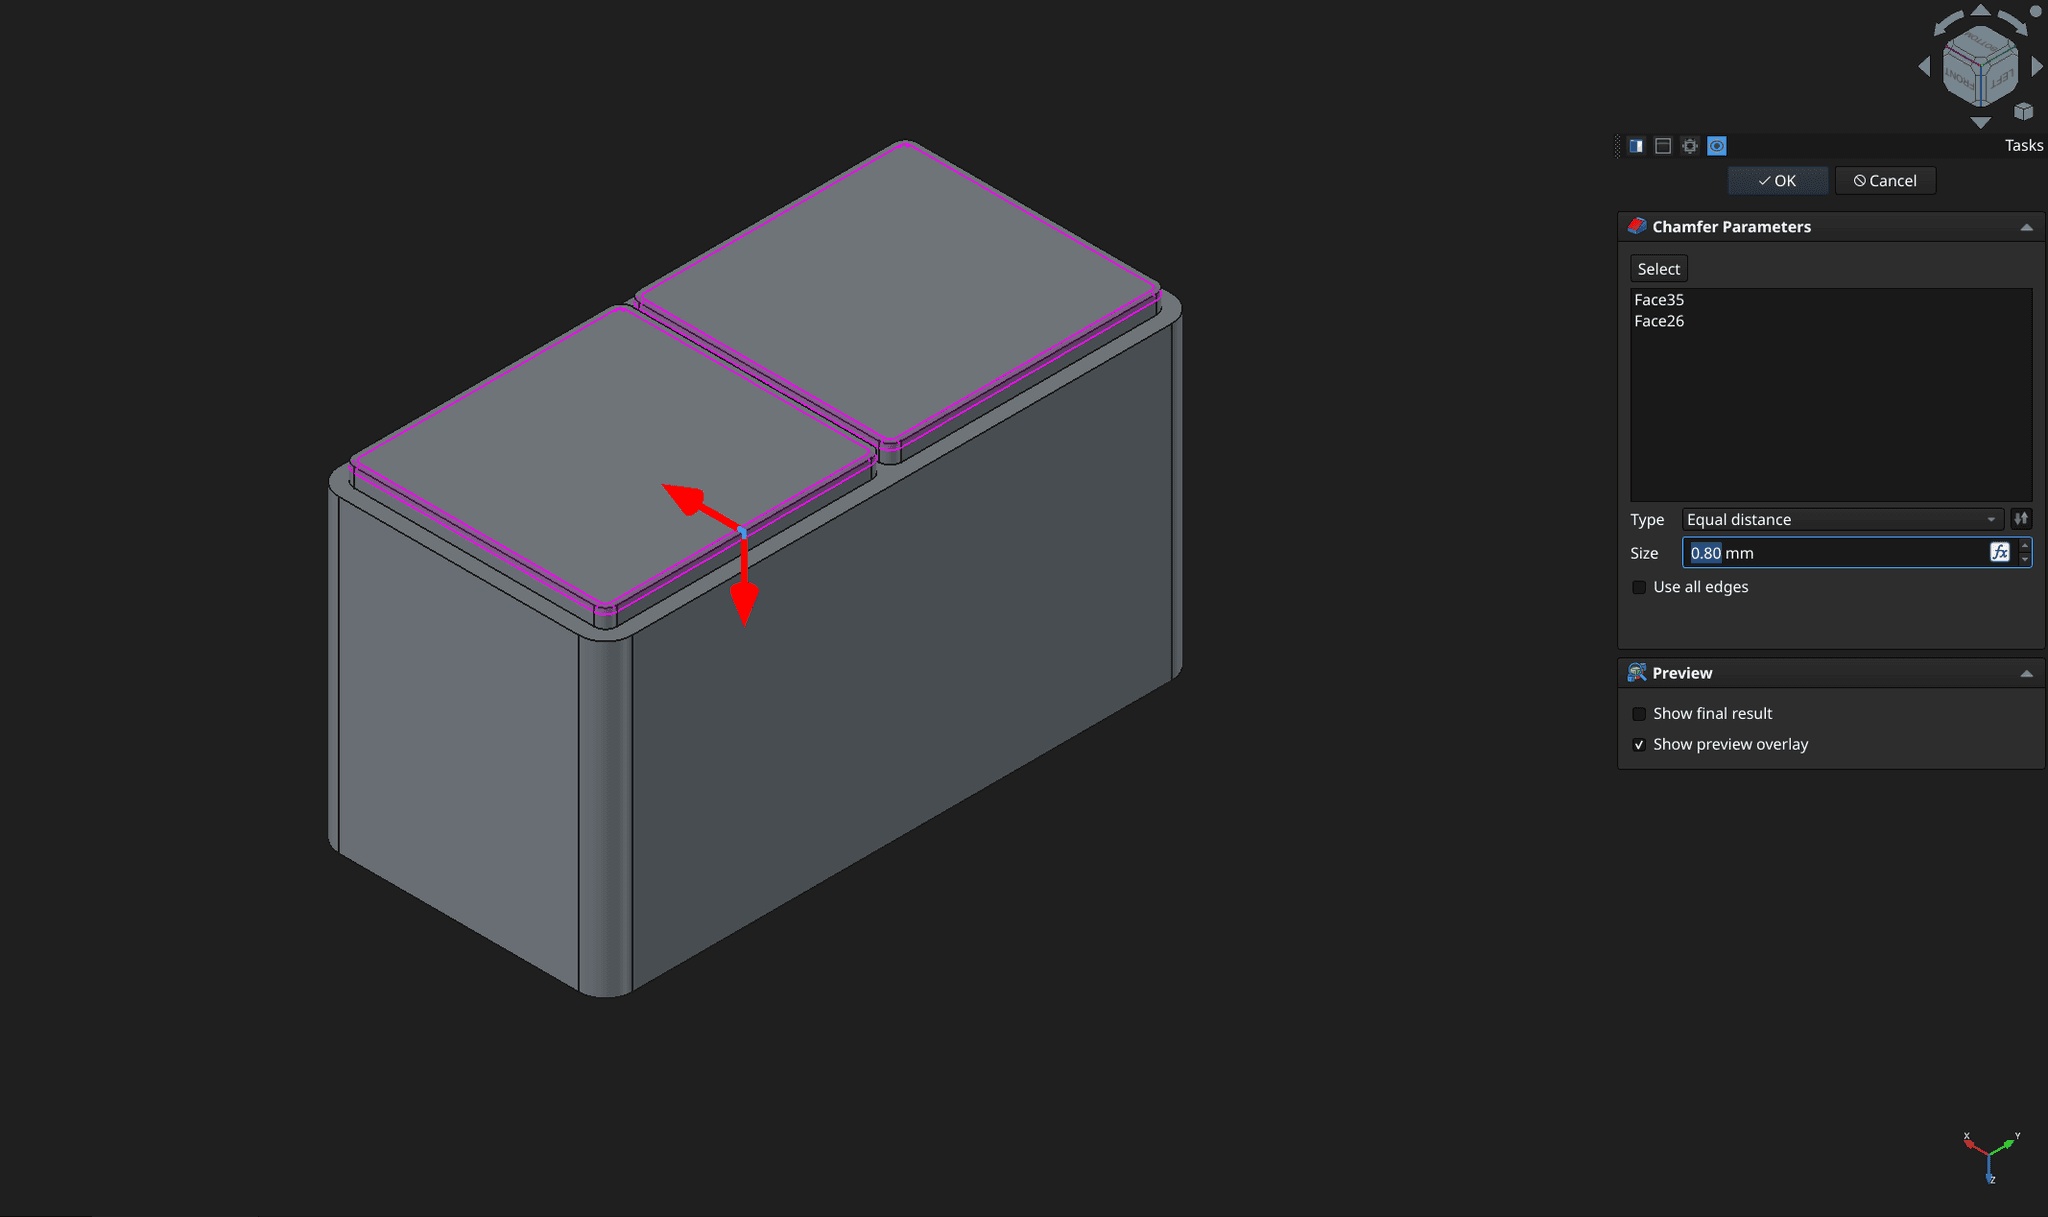
 Next, fillet the lateral edges of the squares you just created with a radius of 1.6mm; chamfer the top faces of the squares with 0.8mm; and finally, create a 2.14mm chamfer on the next face.
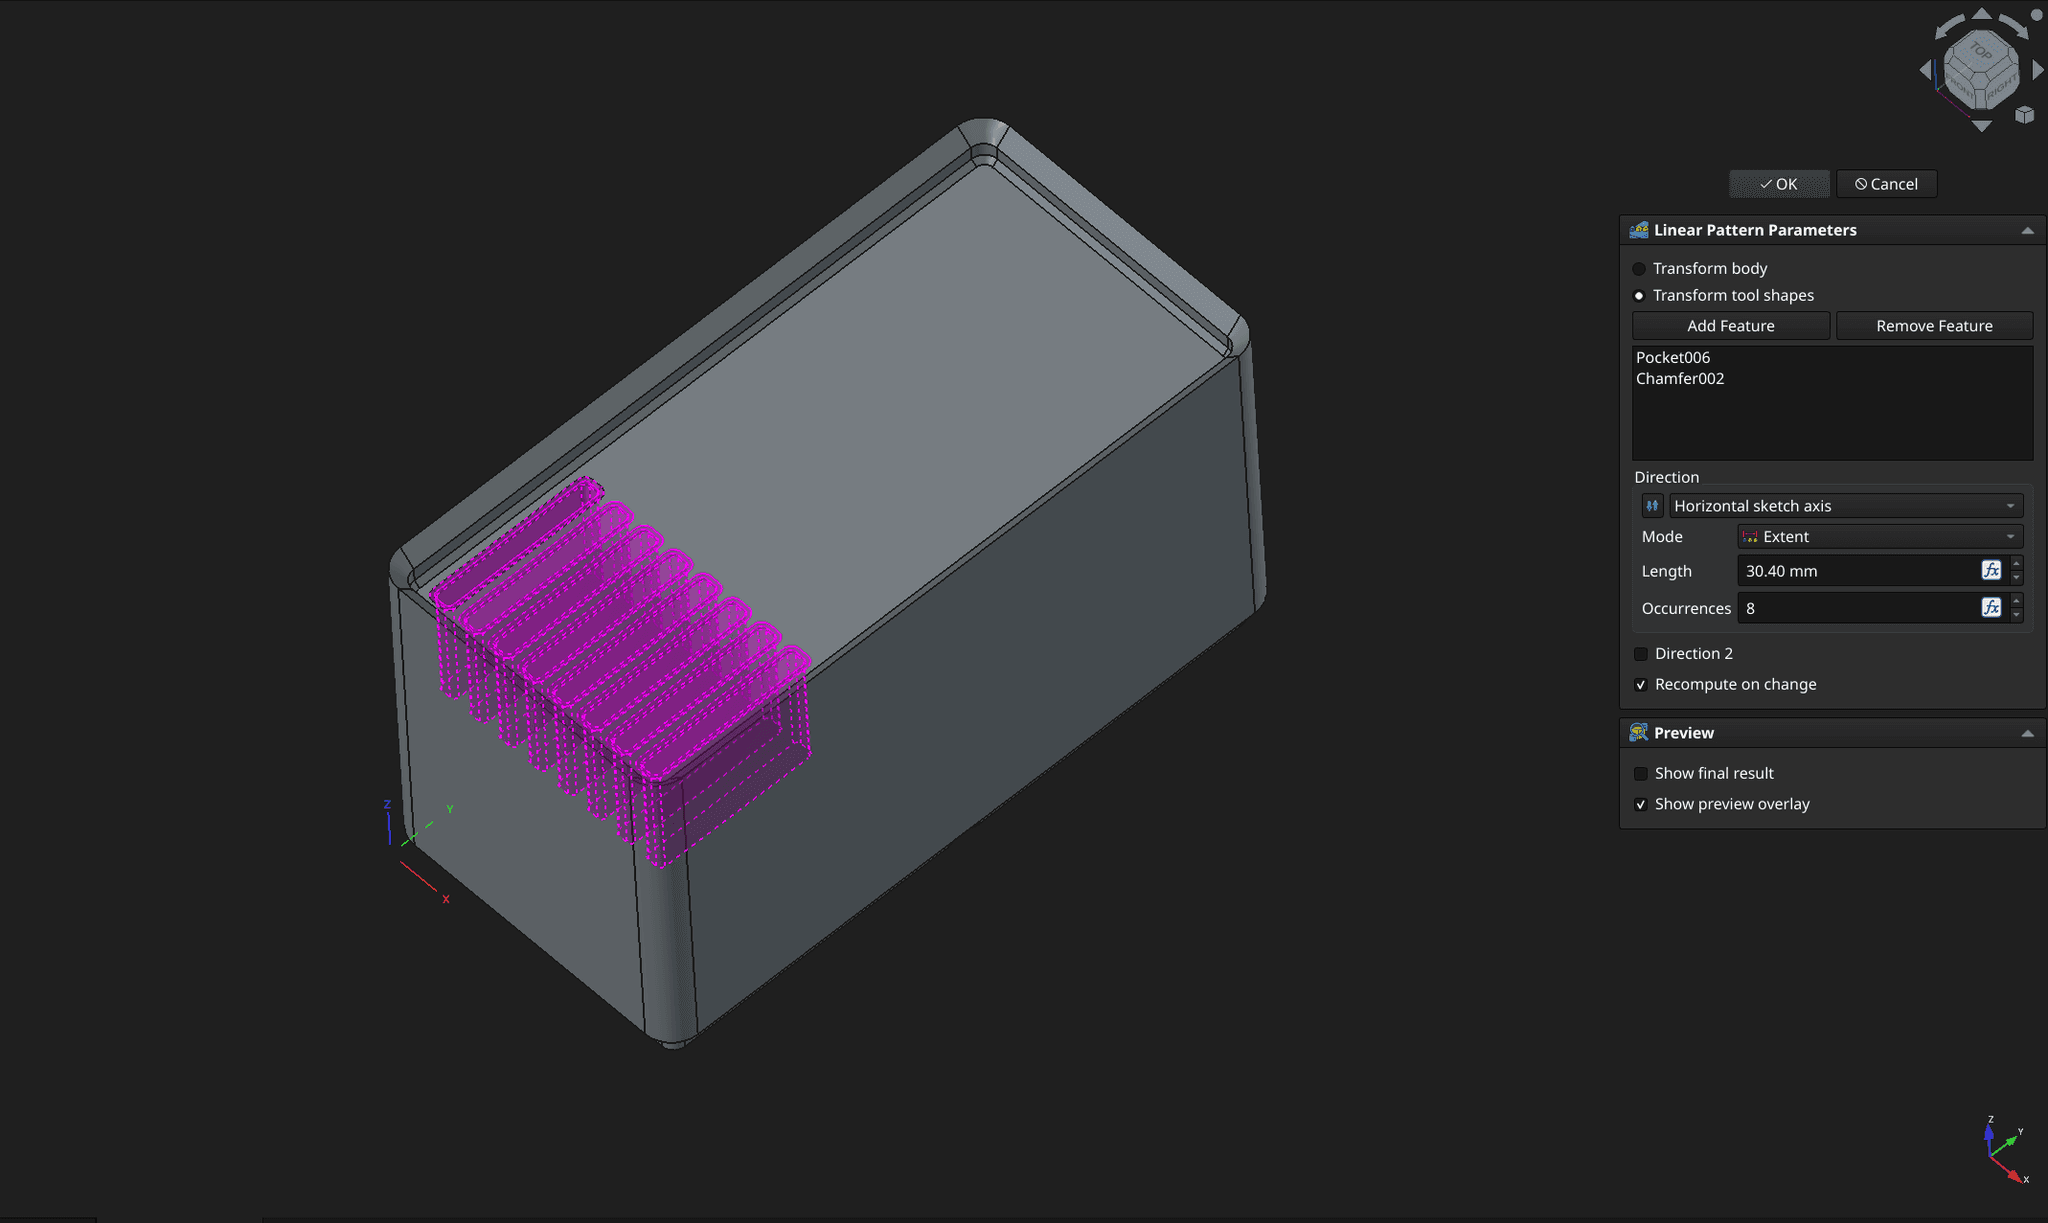
13. Magnet and Screw Holes
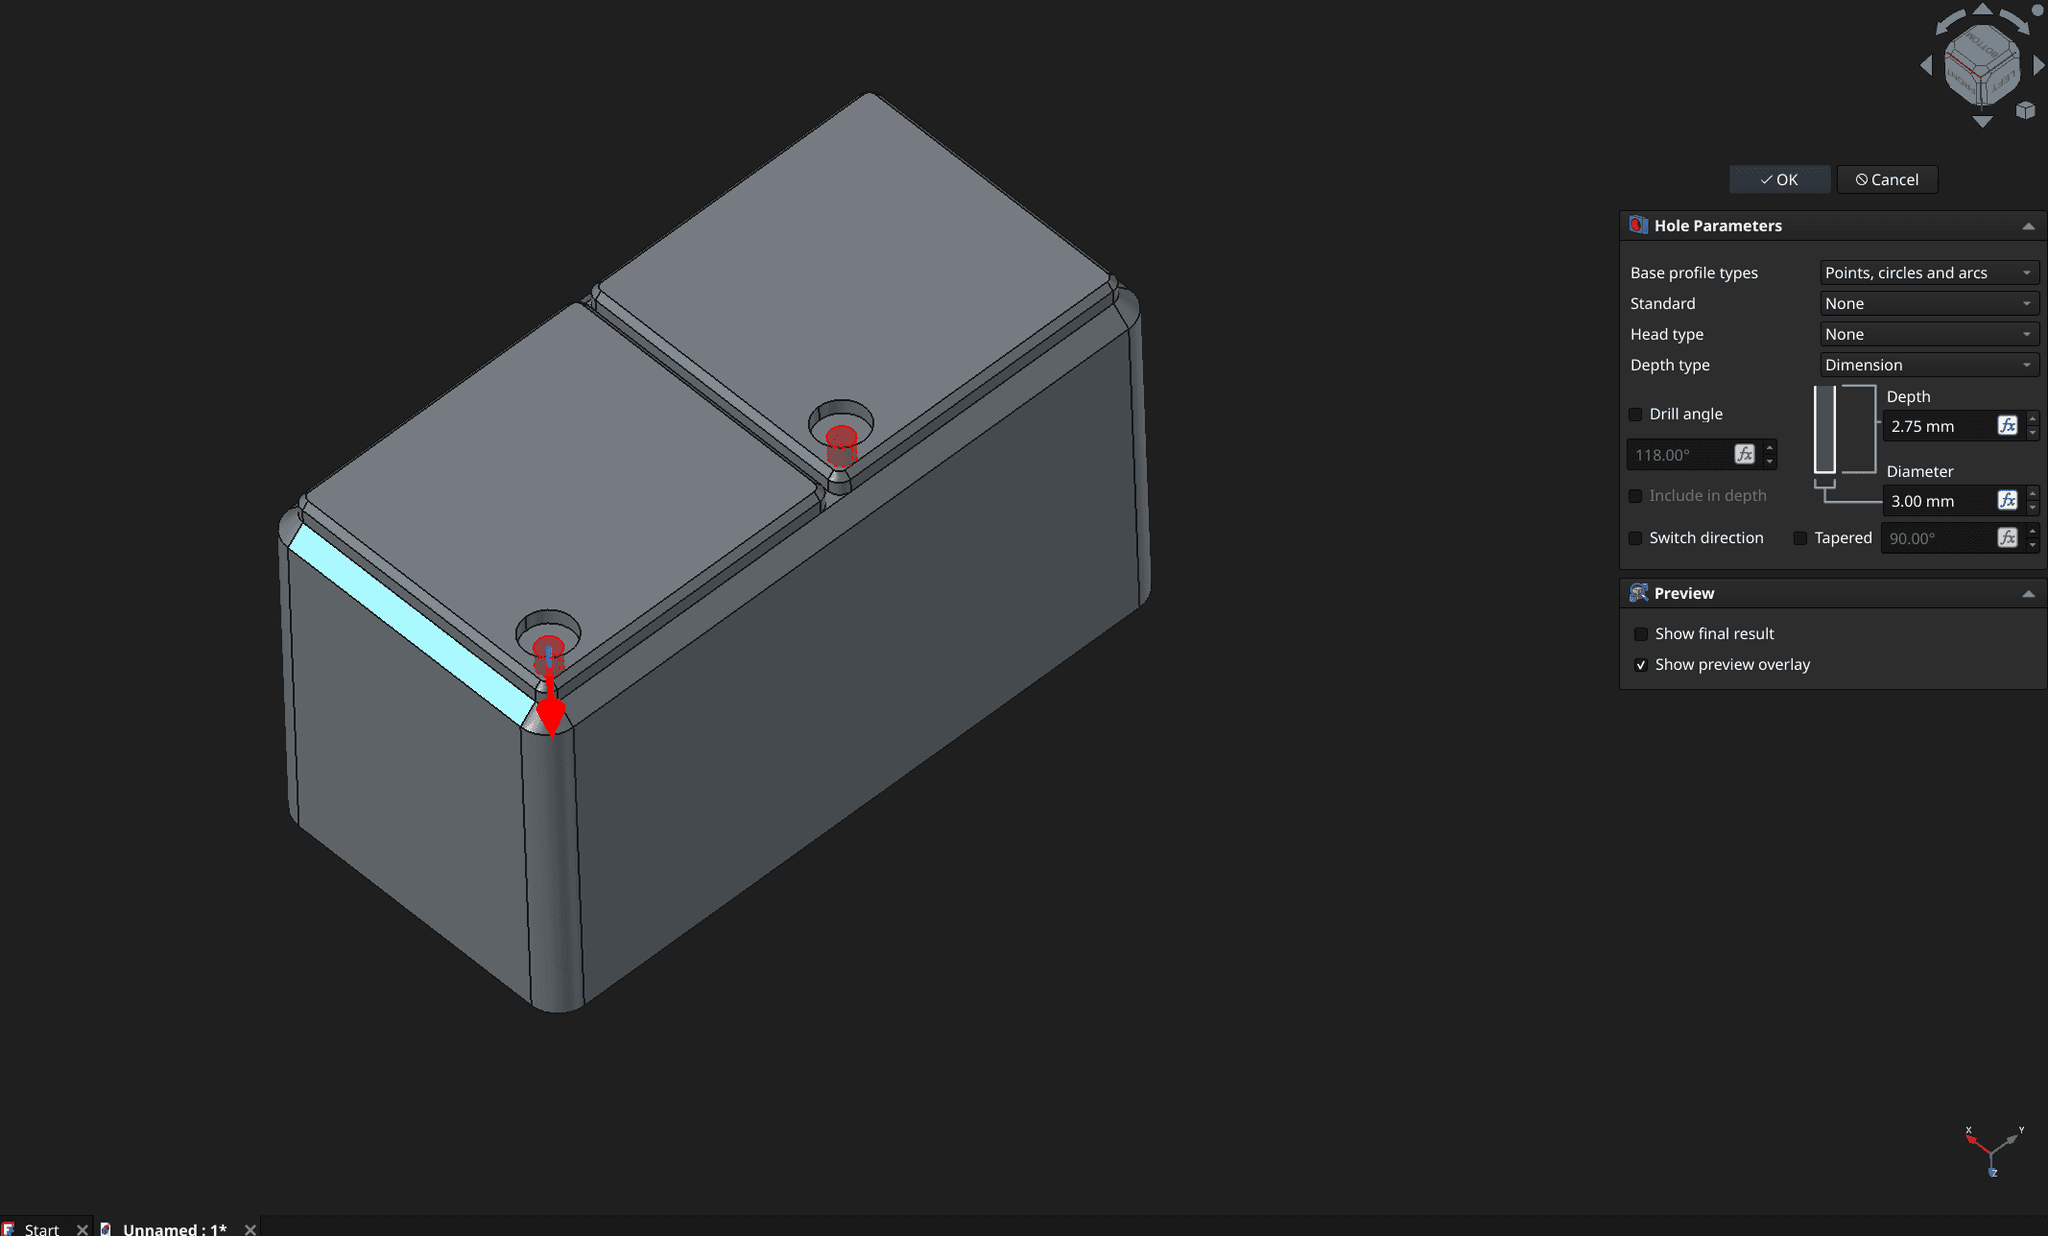
 Finally, using the Linear Pattern tool, select both the magnet and screw hole features and set both direction spacings to 26mm.
Base Bin Complete
Your base bin is now complete. You can stop following the guide here and start customizing your bin by adding dividers, holes, or any other feature you want, or you can continue following the guide if you would like to see how to do so.
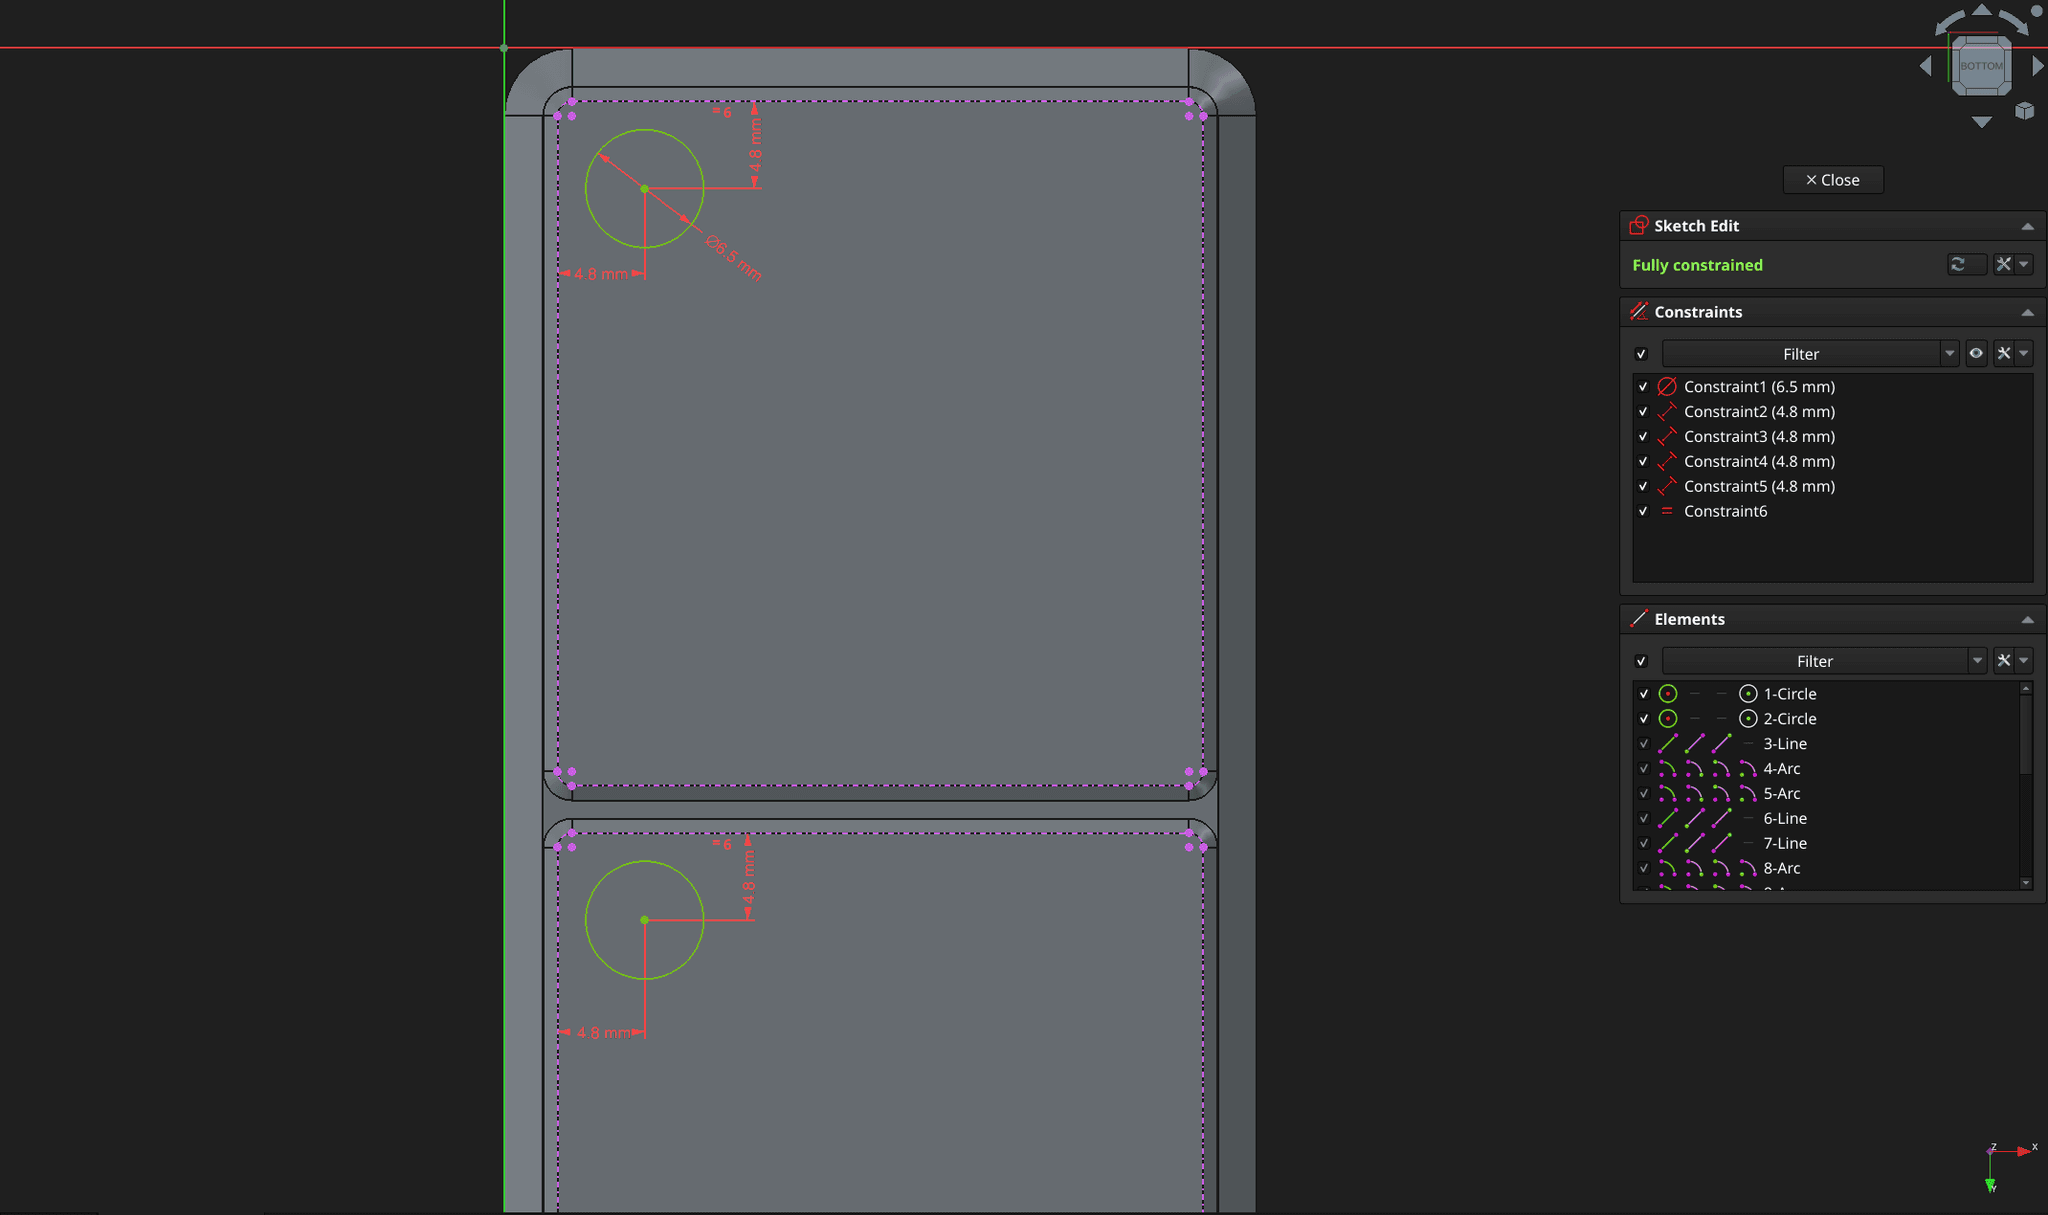
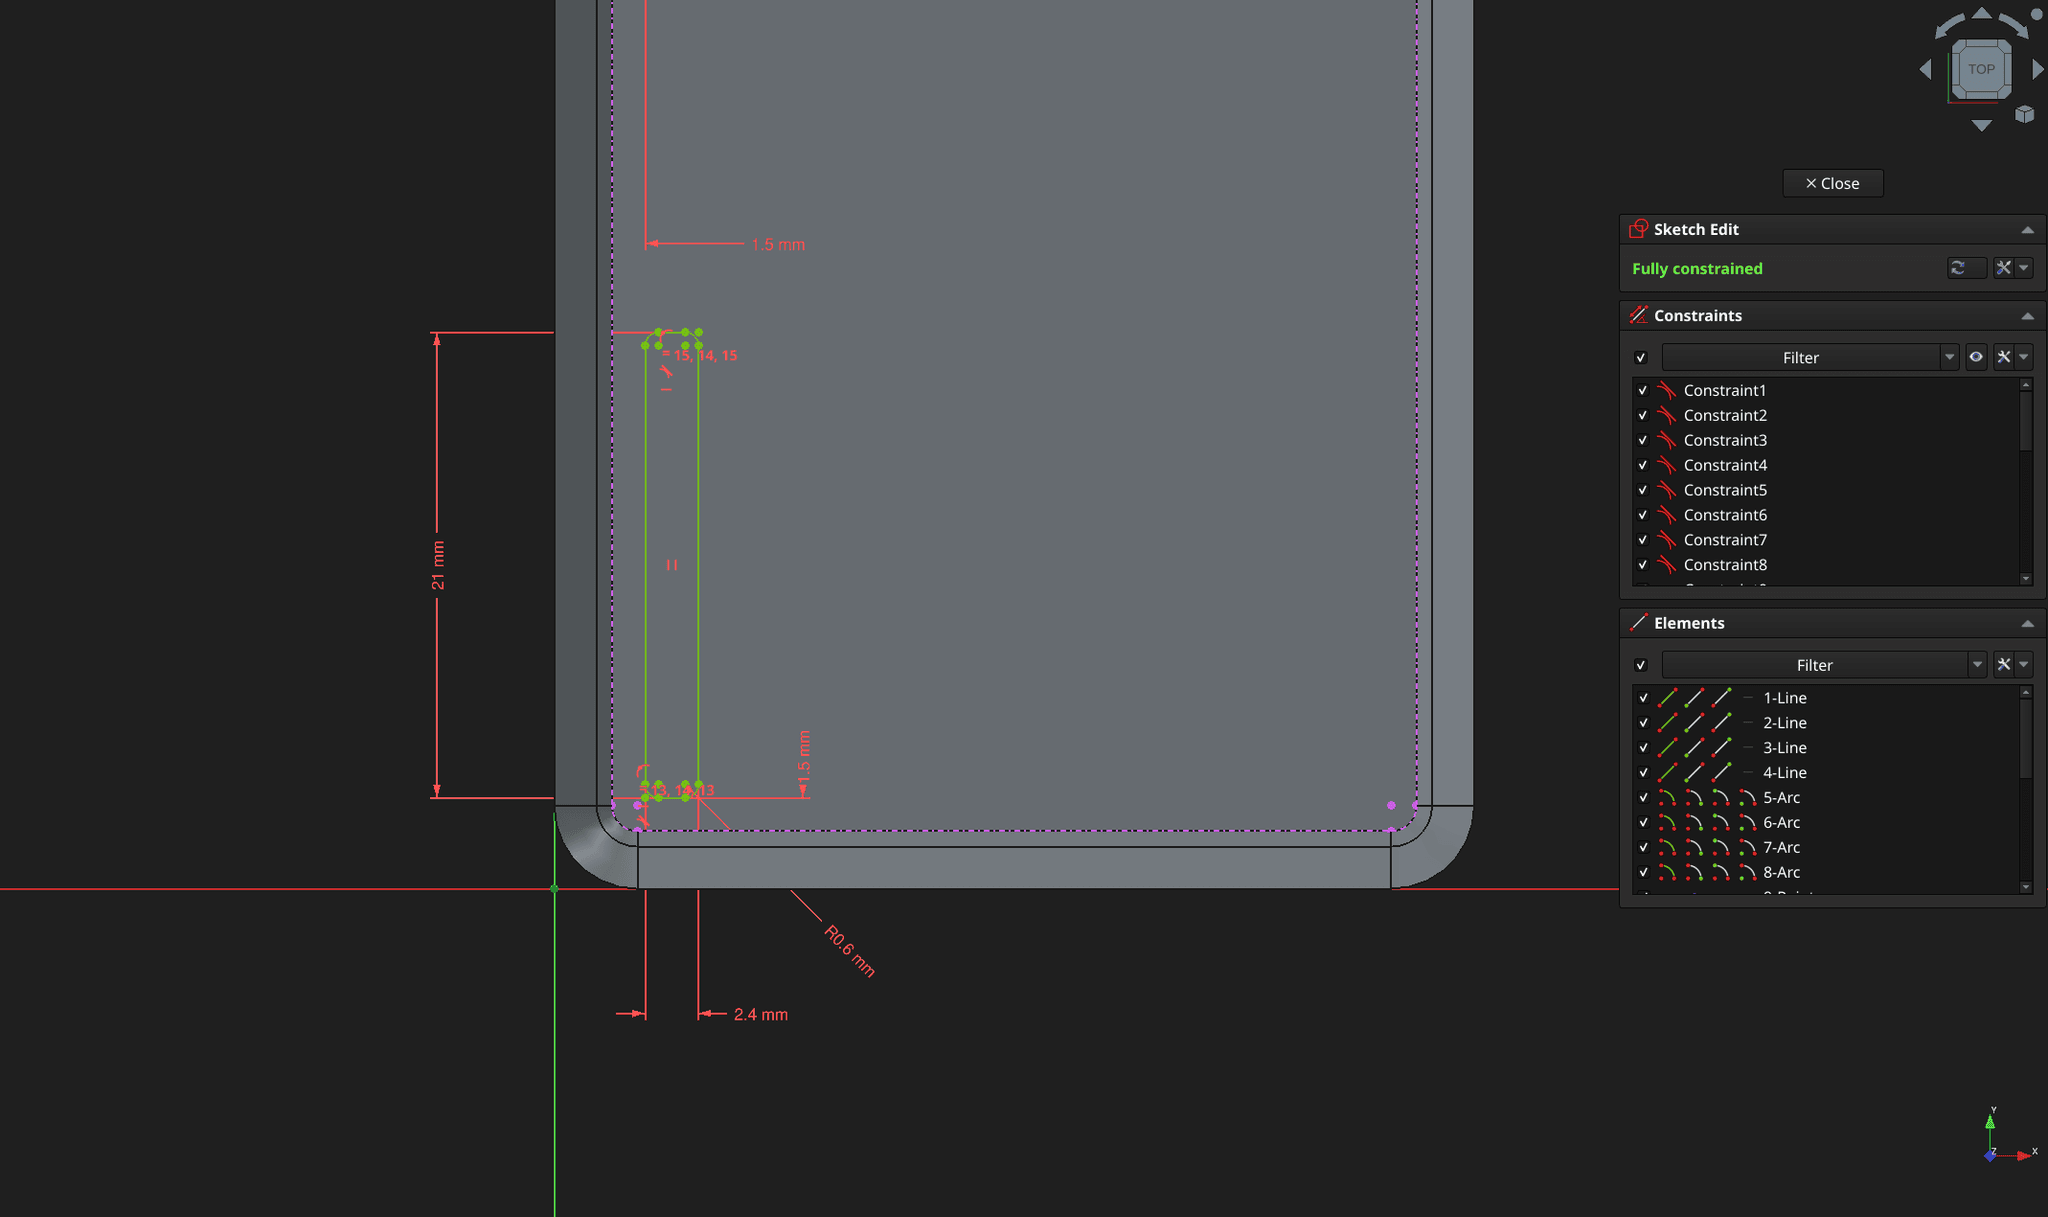
14. SD Card Holes
15. Pen Holes
 To add the pen holes, the process is the same as for the SD card holes, but instead of a 2.4 x 21mm rectangle, create a 12mm diameter circle that is 1.5mm away from the borders.
Export your design and submit it to get your filament grant!
Submit Your Project